Velvet Vanilla Bean Cheesecake
Highlighted under: Fresh Baking Recipes
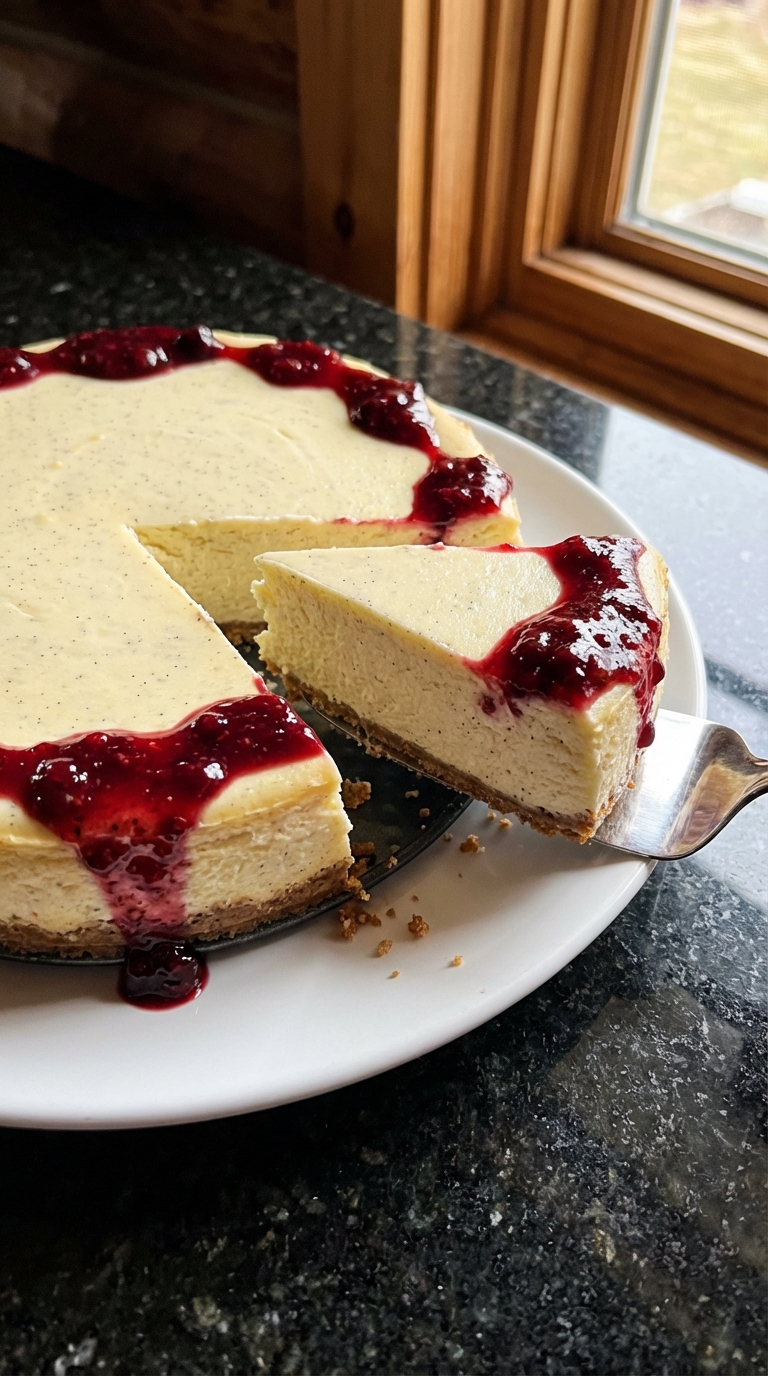
I've always had a love for cheesecake, but this Velvet Vanilla Bean Cheesecake takes the cake—quite literally! The combination of rich, creamy layers infused with real vanilla beans creates an unparalleled dessert experience. This cheesecake is not just a treat; it's the centerpiece of our family gatherings. Whenever I serve it, I am met with delighted faces and happy smiles, making every effort worthwhile. Every creamy bite is a reminder of the love and passion that goes into crafting this velvety indulgence.
Every time I whip up this Velvet Vanilla Bean Cheesecake, memories flood back of my grandmother’s kitchen where the sweet aroma of vanilla would fill the air. I decided to incorporate the whole beans for authenticity, enhancing the depth of flavor that extracts simply can’t replicate. It’s amazing how a simple twist can enrich a classic dessert and make it stand out.
As I crafted this recipe, I discovered the importance of allowing the cheesecake to cool slowly in the oven. This prevents cracks and ensures a smooth, creamy texture. Trust me, waiting for it to set is worth every second!
Why You'll Love This Recipe
- Luxuriously creamy texture that is simply irresistible
- Real vanilla bean flecks for an authentic flavor experience
- Perfect balance of sweetness that pairs wonderfully with tart fruits
Creating the Perfect Crust
The crust of a cheesecake plays a significant role in balancing the creamy filling with its crunchy texture. For this recipe, using graham cracker crumbs provides a subtle sweetness that's perfectly complemented by the richness of the cheesecake. Make sure to press the crust mixture firmly into the pan—this helps to ensure it holds together when sliced. After baking, the crust should appear golden brown and slightly firm. If you prefer a gluten-free option, crushed almond flour or gluten-free cookies work wonderfully as substitutes.
When mixing your graham cracker crust, consider adding a pinch of salt to enhance the flavors. This tiny addition can really elevate your crust's overall taste. Allow the crust to cool completely before adding the filling; this prevents the filling from becoming too warm and ensures a better texture overall.
Understanding the Filling
The combination of cream cheese and sour cream creates a remarkably silky texture in the Velvet Vanilla Bean Cheesecake. Be sure to soften the cream cheese fully before mixing; this helps achieve a lump-free consistency and ensures that it integrates smoothly with the other ingredients. It's best to take the cream cheese out of the fridge at least an hour before you begin mixing, as it needs to be at room temperature for optimal creaminess.
Using real vanilla bean paste is essential for achieving the signature flecks and aromatic flavor in this cheesecake. If you don’t have vanilla bean paste on hand, you can substitute it with the seeds from one whole vanilla bean or use pure vanilla extract, though the flavor profile will be slightly different. Just make sure to maintain the overall volume of liquid by adjusting the quantities accordingly.
Baking and Cooling Tips
When baking the cheesecake, use a water bath to prevent the top from cracking and to promote even baking. To do this, wrap the outside of the springform pan with aluminum foil, then place it in a larger baking dish filled with hot water, ensuring the water reaches halfway up the sides of the springform pan. Keep an eye on it during baking—the edges should look set while the center remains slightly jiggly, which indicates a perfect texture once cooled.
After baking, it’s crucial to allow your cheesecake to cool gradually. Removing it from the oven too soon can lead to undesirable cracking. Letting it sit for an additional hour in the residual heat of the oven not only helps with cooling but also allows the cheesecake to finish cooking gently. Once cooled to room temperature, place it in the fridge for at least four hours, or overnight for the best flavor and texture.
Ingredients
Gather the following ingredients to create a rich and velvety cheesecake.
Crust
- 1 ½ cups graham cracker crumbs
- ⅓ cup sugar
- ⅓ cup unsalted butter, melted
Filling
- 4 (8 oz) packages cream cheese, softened
- 1 cup sugar
- 2 teaspoons vanilla bean paste
- 4 large eggs
- 1 cup sour cream
- 1 teaspoon vanilla extract
- 1 tablespoon all-purpose flour
Now that you have all your ingredients ready, you can start crafting this delicious cheesecake!
Instructions
Follow these steps carefully to achieve the perfect Velvet Vanilla Bean Cheesecake.
Prepare the Crust
Preheat the oven to 325°F (163°C). In a bowl, combine graham cracker crumbs, sugar, and melted butter. Press the mixture firmly into the bottom of a 9-inch springform pan. Bake for 10 minutes, then allow to cool.
Make the Filling
In a large mixing bowl, beat the cream cheese until smooth, then add sugar and continue mixing. Incorporate the vanilla bean paste, then add eggs one at a time, mixing well after each addition. Finally, stir in sour cream and flour until completely combined.
Bake the Cheesecake
Pour the cream cheese mixture onto the cooled crust. Bake for 60 minutes or until the edges are set, and the middle is slightly jiggly. Turn off the oven and leave the cheesecake inside for another hour.
Cool and Serve
Remove the cheesecake from the oven and allow it to cool at room temperature. Refrigerate for at least 4 hours before serving. Enjoy your velvet cheesecake with a drizzle of fresh fruit sauce if desired.
Follow these steps precisely, and you’ll have an exquisite cheesecake that everyone will rave about!

Pro Tips
- For an extra touch, garnish with fresh berries or a dollop of whipped cream before serving.
Serving Suggestions
This Velvet Vanilla Bean Cheesecake pairs beautifully with a variety of toppings. Fresh berries, like strawberries or blueberries, offer a contrasting tartness that enhances the sweetness of the cheesecake. A drizzle of homemade berry sauce or a dollop of whipped cream will elevate the presentation, making it an eye-catching centerpiece for any gathering. You can also experiment with chocolate ganache or a caramel drizzle if you're in the mood for something richer!
Consider slicing the cheesecake into mini portions for a stunning dessert display. Individual slices can be plated with a complementary sauce and garnished with mint leaves for a touch of sophistication. These small servings make it easy for guests to indulge without overdoing it, while still enjoying the lush flavors of the cheesecake.
Storage and Make-Ahead Tips
Storing leftover cheesecake has never been easier. To keep your Velvet Vanilla Bean Cheesecake fresh, cover it tightly with plastic wrap or aluminum foil and store it in the refrigerator for up to five days. For longer storage, you can freeze it. Just make sure to wrap it in plastic wrap followed by aluminum foil to prevent freezer burn—frozen cheesecake can last for up to three months.
If you plan to make this cheesecake ahead of time, consider preparing it a day or two in advance. The flavors deepen as it sits, and the creamy texture will remain intact if properly stored. To thaw, simply move it from the freezer to the refrigerator the night before serving. This way, you can enjoy your cheesecake at its best without the last-minute hassle!
Questions About Recipes
→ Can I use a different type of crust?
Yes, you can use Oreo crust or even a nut-based crust for a gluten-free option.
→ How do I know when the cheesecake is done baking?
The edges should be firm, and the center will still have a little jiggle. It will set as it cools.
→ Can I freeze the cheesecake?
Yes, wrap it tightly in plastic wrap and foil for up to 3 months. Thaw in the refrigerator before serving.
→ What's the best way to cut cheesecake?
Use a warm, sharp knife and wipe it clean between cuts for neat slices.
Velvet Vanilla Bean Cheesecake
Created by: The Recipetrailblaze Team
Recipe Type: Fresh Baking Recipes
Skill Level: Intermediate
Final Quantity: 8 servings
What You'll Need
Crust
- 1 ½ cups graham cracker crumbs
- ⅓ cup sugar
- ⅓ cup unsalted butter, melted
Filling
- 4 (8 oz) packages cream cheese, softened
- 1 cup sugar
- 2 teaspoons vanilla bean paste
- 4 large eggs
- 1 cup sour cream
- 1 teaspoon vanilla extract
- 1 tablespoon all-purpose flour
How-To Steps
Preheat the oven to 325°F (163°C). In a bowl, combine graham cracker crumbs, sugar, and melted butter. Press the mixture firmly into the bottom of a 9-inch springform pan. Bake for 10 minutes, then allow to cool.
In a large mixing bowl, beat the cream cheese until smooth, then add sugar and continue mixing. Incorporate the vanilla bean paste, then add eggs one at a time, mixing well after each addition. Finally, stir in sour cream and flour until completely combined.
Pour the cream cheese mixture onto the cooled crust. Bake for 60 minutes or until the edges are set, and the middle is slightly jiggly. Turn off the oven and leave the cheesecake inside for another hour.
Remove the cheesecake from the oven and allow it to cool at room temperature. Refrigerate for at least 4 hours before serving. Enjoy your velvet cheesecake with a drizzle of fresh fruit sauce if desired.
Extra Tips
- For an extra touch, garnish with fresh berries or a dollop of whipped cream before serving.
Nutritional Breakdown (Per Serving)
- Calories: 380 kcal
- Total Fat: 26g
- Saturated Fat: 15g
- Cholesterol: 195mg
- Sodium: 85mg
- Total Carbohydrates: 32g
- Dietary Fiber: 3g
- Sugars: 24g
- Protein: 6g